Speaking of Trailers

So recently I sold the cargo trailer that I used to haul my powered parachute around.  It was nice in that it had lots of storage and was convenient to sleep in when I went to fly-ins but it was a bear to tow.   Because of its high profile it was very susceptible to wind and the faster I drove, the worse my gas mileage got due to the wind resistence of the trailer.

To remedy this I purchased and built up a Harbor Freight trailer.  I built it pretty much standard as it comes out of the box.  I put a 3/4 inch plywood deck on the top of it and then got it registered and licensed.  As a side note there was a problem registering Harbor Freight trailers for a short while but that issue has been straightened out.  Registration was pretty easy though a little time consuming.  The process is basically:

  1. Complete an Application for Title of Registration (Form REG 343).  This is available for download from the California DMV website.
  2. Bring the form along with the trailer’s title California DMV office.  Harbor Freight will give you a title when they sell the trailer kit to you.
  3. Bring documentation of sale price of the trailer (the receipt from Harbor Freight)

I suggest making a reservation at the DMV office rather than just showing up.  You’ll still have to wait but it won’t be as long a wait. Once it was my turn, they checked out the trailer (mostly just making sure the VIN number matched what was on the paperwork) and then handed me the license plates before I even left the office.  The official registration was mailed to me later.

IMG_20190112_091436

Since the trailer is too narrow for the wheelbase of the PPC, I added some outriggers on the rear of the trailer and cut a section from a loading ramp and bolted it across the outriggers.  This became the platform for the rear wheels.  I mounted it upside down to keep the wheels from sliding off the edges.  I also placed a heavy duty floor mat on this platform to keep the metal from cutting into the PPC’s tires.  The remainder of the cut up loading ramps were used as… you guessed it… loading ramps.  They will be finished off with ATV straps (not shown in these photos) that will hold the tires down on the platforms.

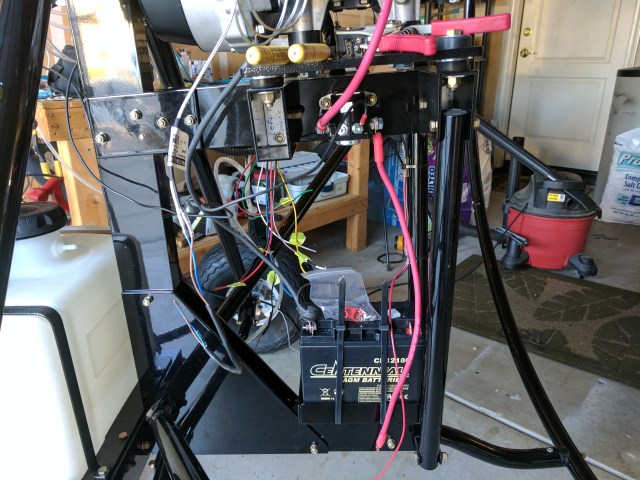
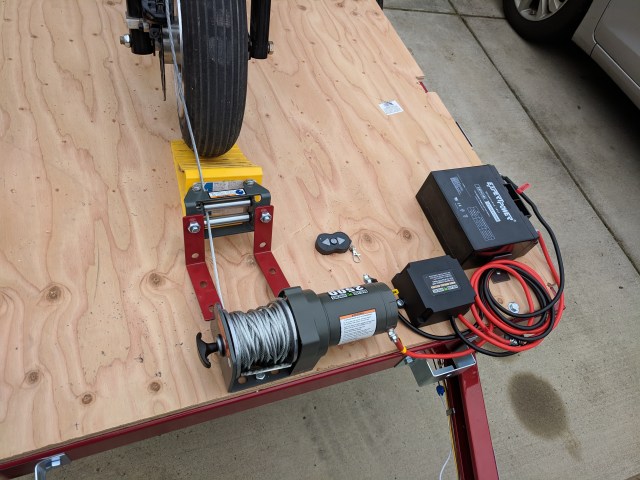
My PPC isn’t all that heavy but pulling it up the ramps has to be done slowly and carefully so that the wheels don’t fall off the sides of the ramps.  To make that a more precise operation I mounted a winch in the front of the trailer.  It is remotely operated so I can stand in front of the PPC and guide it carefully onto the trailer while the winch does the pulling.  I also added a battery to operate the winch rather than run it off my truck power.  I’ll just put the battery on a charger every month or so and it should be fine.

IMG_20190112_091448

Now I just have to wait for the weather to clear up so I can give the trailer a test and drive it out to New Jerusalem and do some flying!

Here’s a bonus video of me describing the trailer.

Flying

Not much to say this week.  I did install a larger fuel tank on the Swamp Plane.  (I’ve taken to calling it a Swamp Plane because people have asked if it’s a swamp boat or swamp buggy).  This video is from a test flight after installing the new fuel tank.  Enjoy!


P3 Engine Break-In Complete!

After some back and forth with the factory I was finally able to finish my engine break-in today.  My EGT’s were still running a little hot so I did two things; I started from scratch on the air screw and idle screw on the carburetor, and I CAREFULLY mixed 20:1 Amsoil in some premium auto fuel and replace the fuel that was in my tank with this new gas.  I may have been a little sloppy with my mixing before.  Sure enough, this time EGTs were down where they were supposed to be.  So…

Ta-da!

breakin-checklist

So the next step is to let Ken, the local Six Chuter dealer take a look at it, rig the parachute, and probably let him do the first flight to make sure everything is copacetic.  There’s a possibility of me being able to go up to see Ken on Sunday, but if not then some time next week.  We just have to work around the winds.

PPC Engine Break-In

After the first run of the engine the very next thing you have to do is go through the break-in process.  I’ve been experiencing heating issues with trying to go through the break-in period.  It’s running hot.  I called Six-Chuter’s Rolando and he had me adjust the needle in the carburetor.  This helped but I’m still running overly hot in the 4500-5000 rpm band.

egt

My next steps are to, drain the fuel and put in new fuel, I’m going to double-check the oil/fuel mix ratio to make sure I didn’t mess something up.  I’m also going to call Rolando again to see if there is anything else I can check.

PPC Engine Start!

This weekend I went to a local fly-in to meet up with a friend of mine who helped me out with the first startup of my engine.  It took a little to start it but it finally came to life.  Joey video’d the startup but it’s shared in a private facebook group.  I’ll try to get the video and put it up here.

So now that I got the engine running it’s time to do the break in.  There is a very specific procedure you have to follow, running the engine at specific RPMs for specific amounts of time.  In doing this I noticed a couple of issues.  My idle RPM was registering at 3000 RPMs.  The engine seemed to not want to run at that RPM very well.  Also, Joey remarked that it wasn’t very windy behind the prop.  Those were two things that were nagging at me.  So I changed the calibration of the tachometer so that it registered the idle RPM at 1500 RPM or so.  That seemed more in line with what the engine was actually doing.  Then when I ran the engine at the prescribed break-in RPMs, it ran much smoother and I could feel more “push” from the prop.

Another problem I ran into at first engine start was that my EGT (exhaust gas temperature) didn’t seem to be working.  It turned out that it was!  I just needed to run the engine at a higher RPM.  So as I was doing the break-in at the higher RPMs I noticed my EGT was up past the recommended 1100 deg Fahrenheit and even started to hit 1200 which is the absolute max.  I decided to throttle back and let the engine cool down after which I shut down.  I’ll contact Six Chuter tomorrow to get their opinion on what I should do to fix this problem.

I now leave with with few photos from the MacFarlane Farms Fly-in…


PPC Assmbly Complete!

This is my wrap-up video for my Six Chuter P3 Lite powered parachute.   I only have to items to finish; connect the gas line to the fuel tank, connect the voltage regulator to the battery.  Everything else is complete.  I had to move a few things around when I found I had mounted them in the wrong place.  Now I have holes where I don’t need them.  We call those lightening holes.  An aircraft term used to refer to holes cut to save weight in the airplane. 🙂

Anyway, here’s a wrap-up video…

PPC Assembly Day 11

Progress for today:

  1. Strobe mounted and wired in.
  2. Fuel tubes and squeeze bulb fabricated.
  3. Battery ground cable installed.

I found that I mounted the started solenoid in the wrong place.  It can still work here.  The only problem would be the longer rear wire.  If I can’t tuck it away safely, I’ll move the solenoid.

IMG_20170413_183736

PPC Assembly Day 10

A few more minor things done today.  There were a few bolts that I wasn’t happy with the sizes, a little too long, a little too short so I ordered some more bolts from Aircraft Spruce.  So with the bolts in hand I was able to mount my starter contactor (solenoid), and mount the regulator more securely.  I also started on the fuel hose and primer bulb.


There has also been some talk about fuel pumps.  I’m inclined to keep it in the factory position as they say they have not had any problems reported to them with this setup.

IMG_20170412_182906

However, I’m not opposed to mounting it in a more favorable position, which would be above the fitting on the crankcase (follow the clear hose on top of the fuel pump.)  I just can’t see a way to do that.  Any ideas?

IMG_20170412_182934